You can connect to a virtual desktop at the ARI by using a program called NoMachine.
The first step is to obtain NoMachine.
To do this, you need to know which operating system you're using. Click here if you're unsure.
Once you know which operating system you're using, please select the appropriate version below:
Windows

Mac
Linux
Once you have downloaded the appropriate version of the Nomachine client from the links above, click the icon to install.
Note that for Windows installations there are some additional fonts that can be downloaded and installed in addition to the program.
Installation is similar for all operating systems and requires you to accept the license agreement, select an installation folder, and enter any information necessary to permit the install.
At this point it is assumed that the Nomachine client is installed successfully.
Launch the Nomachine Enterprise Client by clicking the desktop icon or start menu icon
At the first run you will not have any stored connections - to create one click the "Add" button.
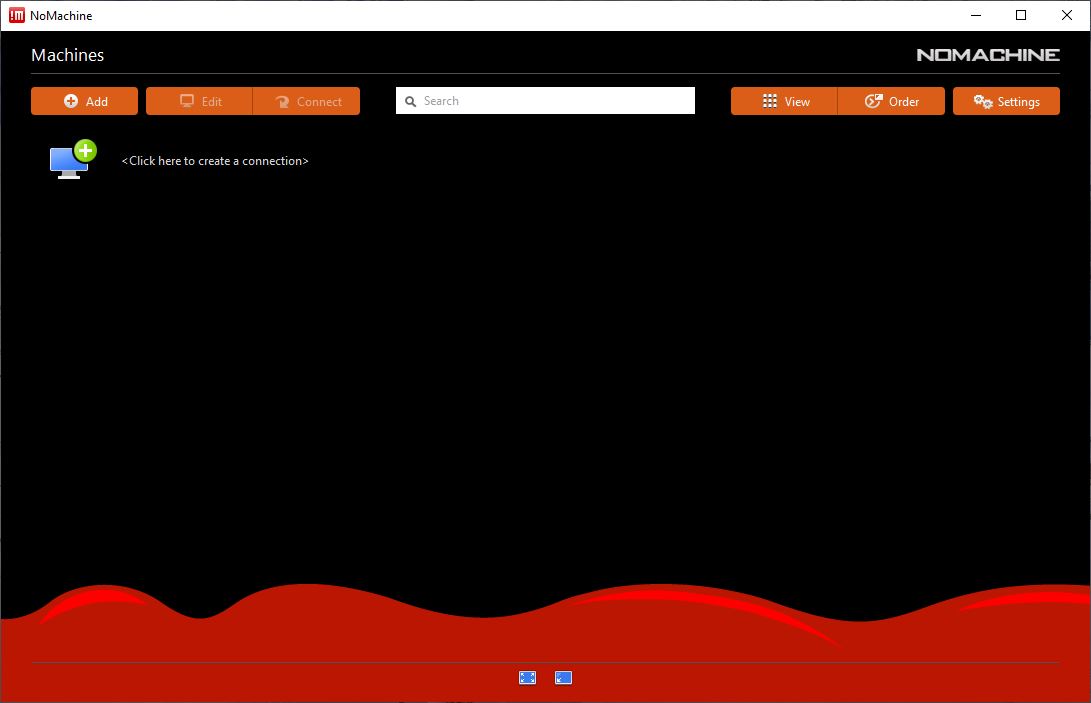
Add a name for the connection, eg "Connection to the ARI" and enter the Host name that you will have been given via email. Make sure the Port is 4000 and the Protocol is NX, then press connect.
When you next start Nomachine, the connection that you just made will be shown as an icon. You will then only need to click that icon instead of creating another connection.

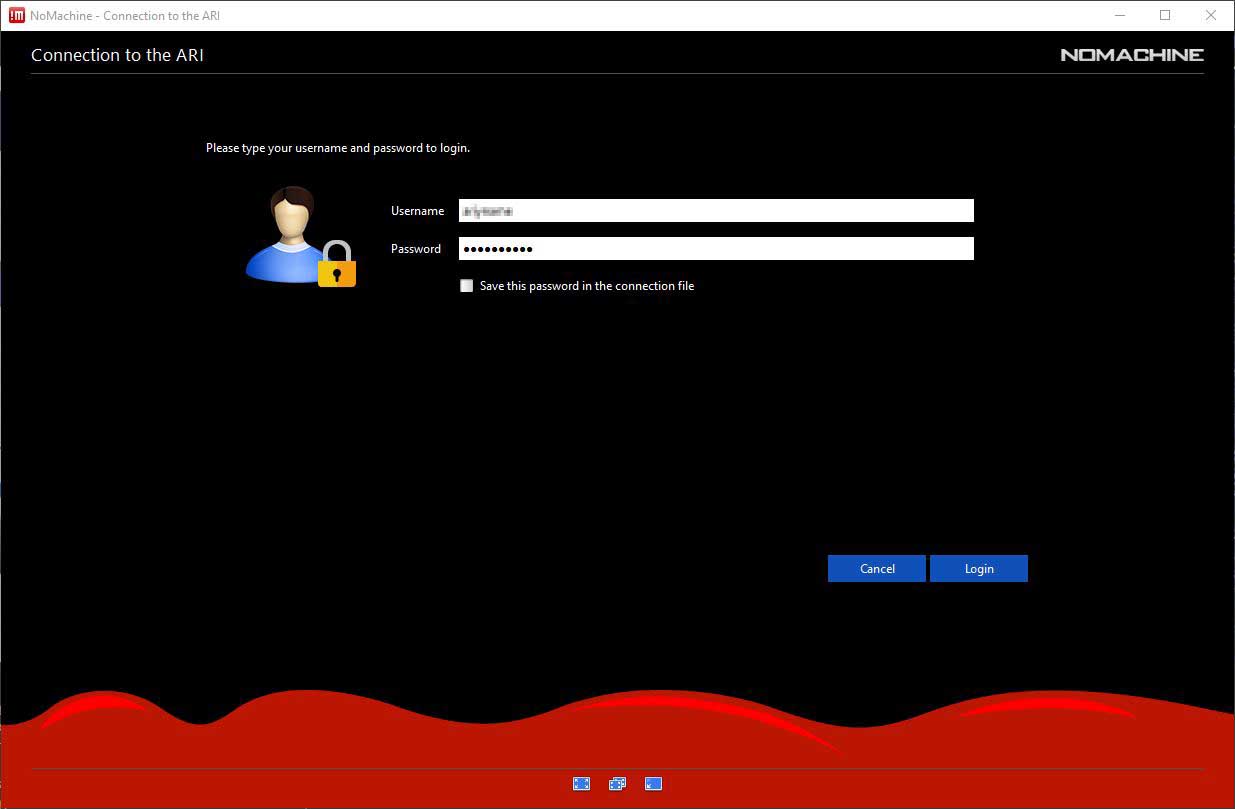
Enter your username and password that you will have been given via email and click login.
If there are any connection problems, please press cancel to go back and check the connection details you entered on the previous screen. The reconnect and check that your username and password have all been entered correctly. If you are sure that you have entered all information correctly please contact the person that gave you your login details and please include your public IPv4 address such as can be found here.
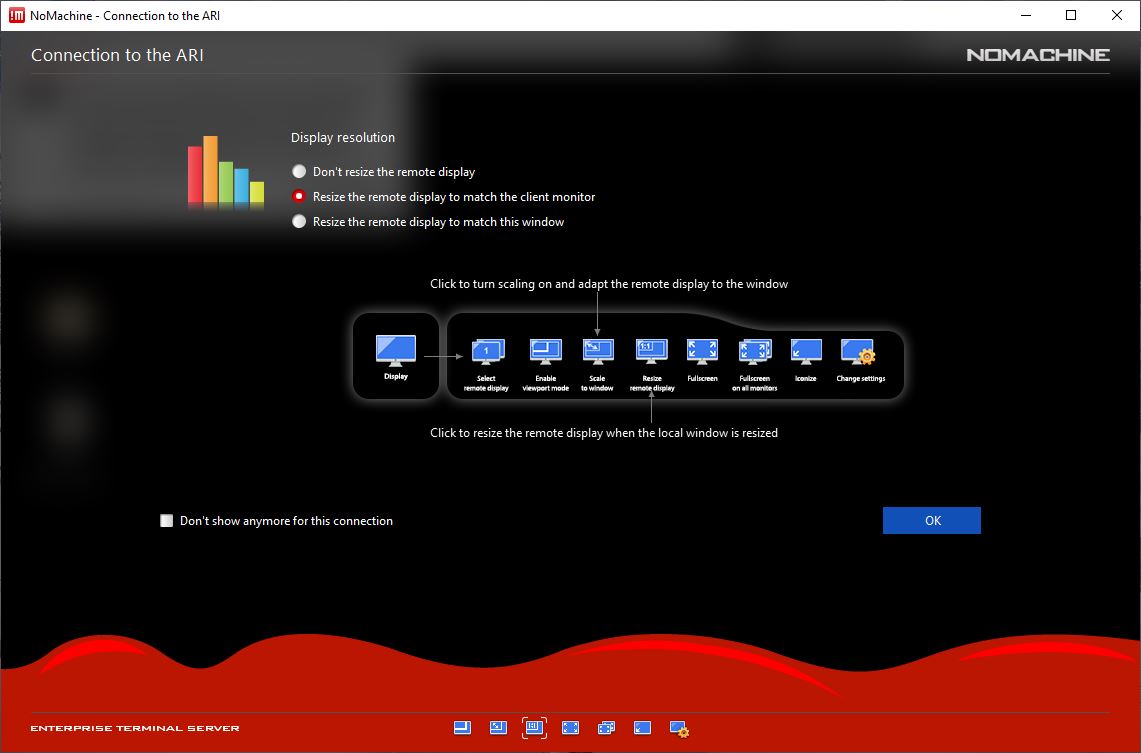
After a successful connection you will get a few screens showing Display resolution options.
Most find the best options to "Scale the remote desktop to fit the window" on the first screen.

The second screen is then set to "Resize the remote display to match the client monitor" and the icon at the bottom to "Resize remote display" (the one with the 1:1 symbol on it). Both these screens will keep showing on subsequent connections until the "Don't show anymore for this connection" box is checked. Although the display options can be accessed as shown later.
When finished, press OK.
Finally you will be shown a linux desktop.
For those unfamiliar with linux...
- The applications menu is on the top left.
- A shortcut panel is shown at the bottom-middle with useful icons like the terminal and web browser (firefox).
- The time and your name (which is another menu), and a few other icons are shown in the top-right.
- To the left of those are 4 boxes of which one is highlighted which are four virtual desktops which you can switch between.

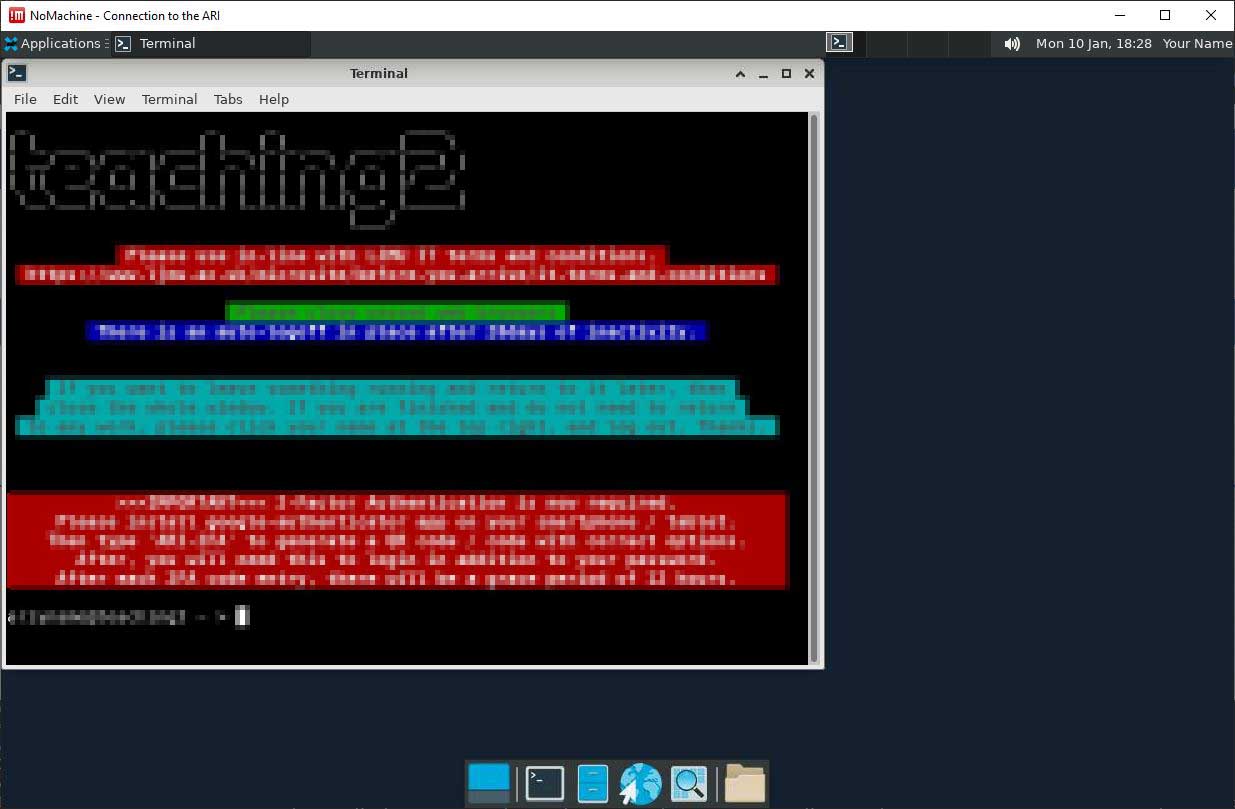
Clicking the "Terminal" icon will start a text terminal which will be the main way in which you interact with linux.
Various items of information will be displayed when you initially start the terminal.
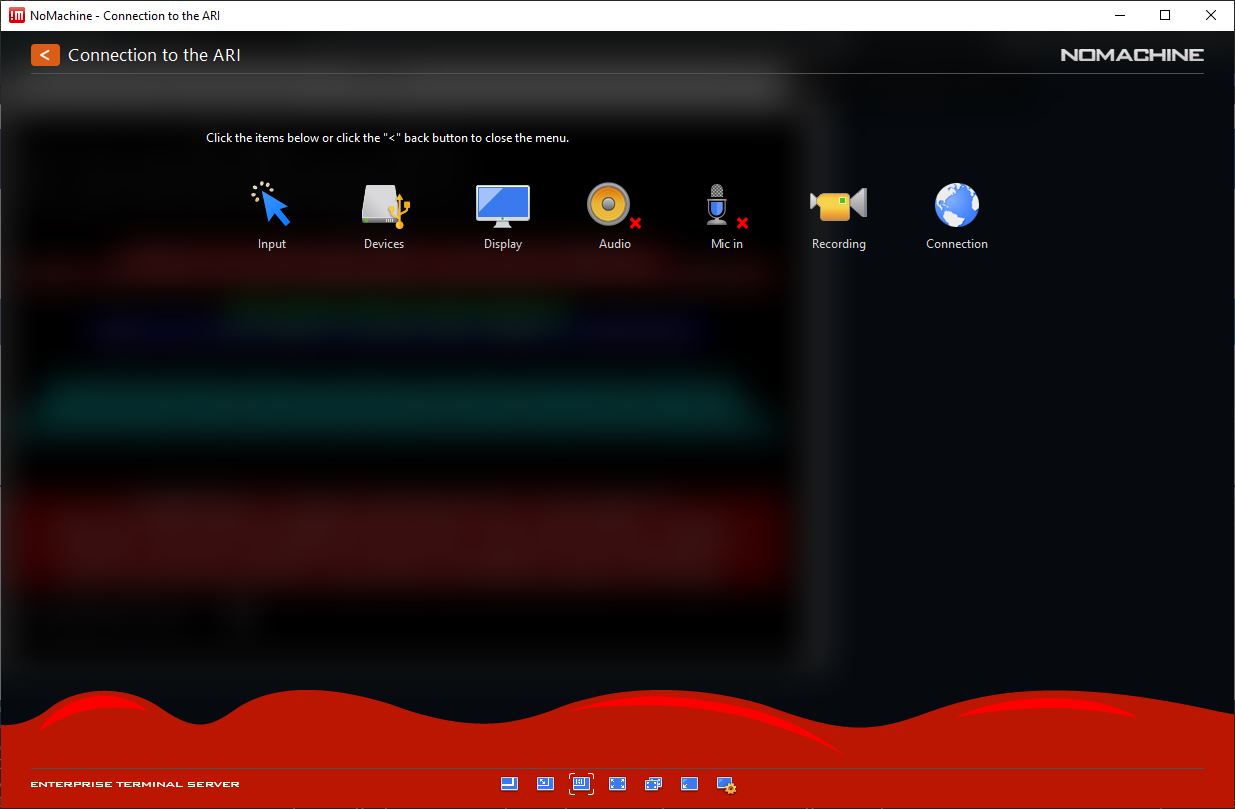
To access the settings menu you can either press the keys "CTRL+ALT+0" (zero) or by moving your mouse up to the top right of the desktop, click the corner which folds over.
In this menu you can access the display settings if you wish to experiment with different options which you may find better for you.
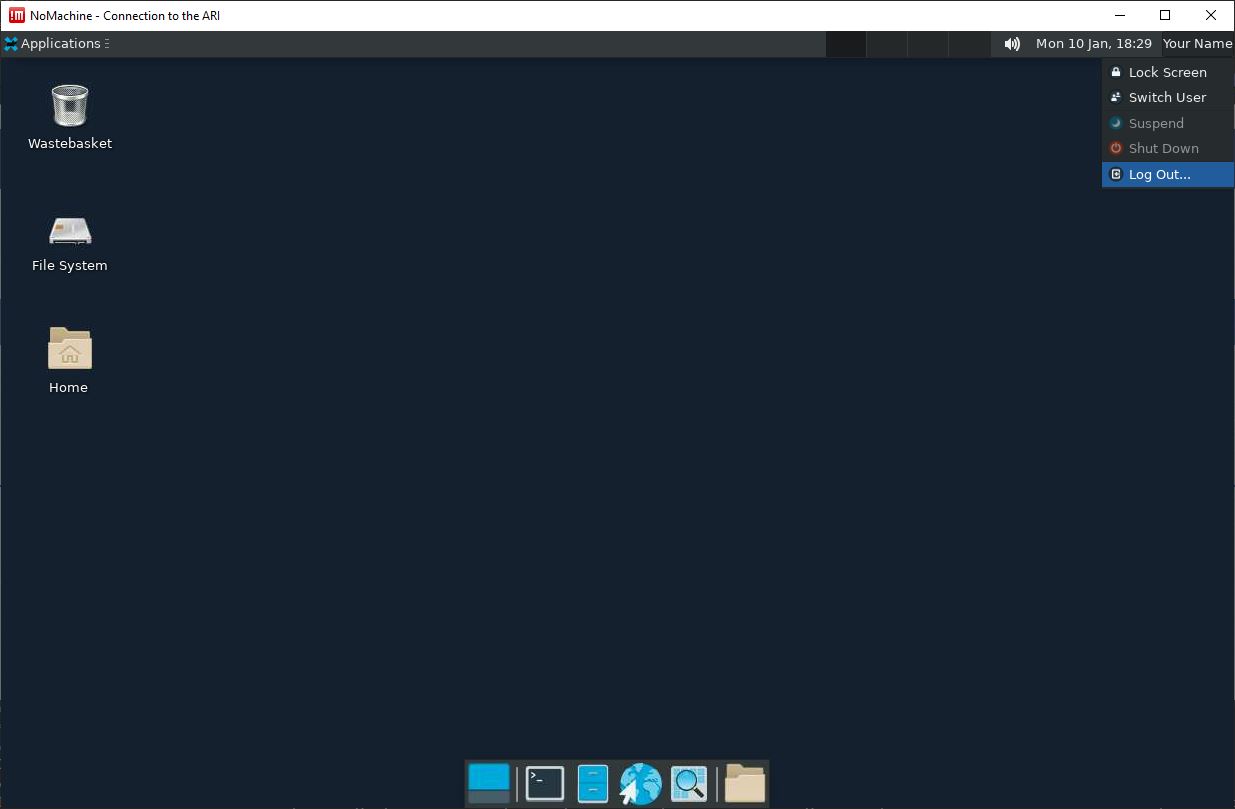
Finally to close the session there are two options depending on whether you want to 1) log out and close everything or 2) keep everything running so you can come back later and pick up where you were.
- Click on your name at the top right of the desktop which will drop down a menu. Click log out.
- Close the whole nomachine window by the "X" button - this suspends the session and does not actually close anything. This is equivalent to locking your screen.
Please log out if you are not running anything as a session will use resources even when suspended.
Two-factor authentication will be enforced very soon so we ask you to set this up as soon as possible so as to avoid problems later when it is enforced and you need to access the system.
You will firstly need to download Google Authenticator or Microsoft Authenticator from the Google Play store or the App Store.
From whichever app you install on an android or apple device, you should add an account by scanning a QR code.
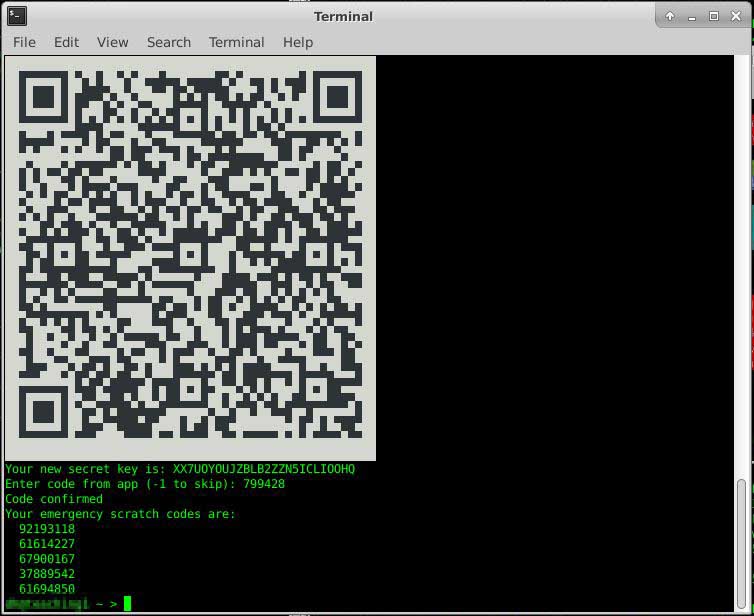
To generate this code, open a terminal in Nomachine and type "ARI-2FA" into it. This will create a code with the correct options like is shown below.
Scan this code into your device and it will display a One Time Password code which changes every 30 seconds.
You should type this code into the terminal to confirm.
Once successful it will write this to the system and you will need to use this code when you next log in.
Please note the emergency scratch codes. You should note these down and store somewhere safe as they can be used (one time each) instead of the authenticator app if you don't have your device to hand.
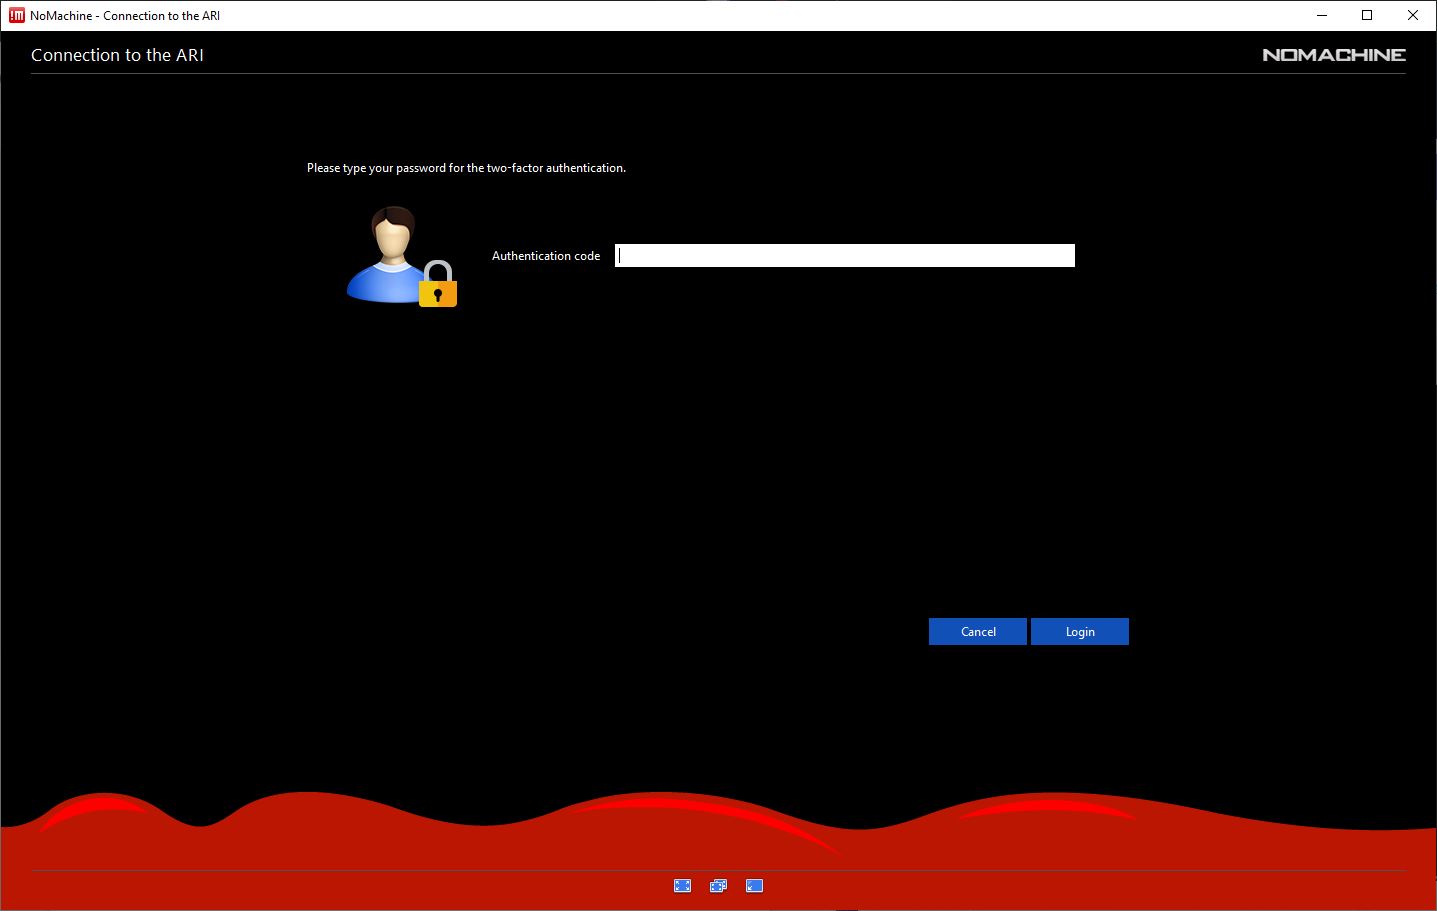
When you next log in, after the username and password screen, the following screen will be displayed which will ask for the code from your app. Open the app and type in the code displayed.
If you have not set up two-factor authentication yet but get asked for the code, this is because your username or password were not recognised. Please go back and double-check that they have been entered correctly before reporting any problems.
If you have set up two-factor authentication, then you will get asked for your username and password and then the authentication code. If ANY of those are wrong you will get the "Authentication failed, please try again" error. The error is, unfortunately, unclear and appears to refer only to the code, but it could be any of them. Please cancel the login and double-check the username and password is correct before the authentication code stage.